It was not easy task to continue on one year old project, but Iam glad that I archieved this point of this build. Too many things happened in my life in the past year (like wedding, moving into a new flat, guinea pigs, holiday, etc.) but now Iam finally able to continue on this project.
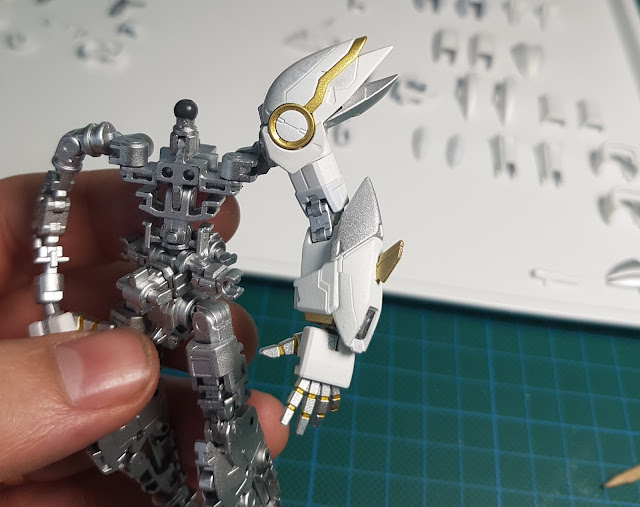
In this fourth entry I want to describe you guys how I archieved look like on the upper picture, and hell yeah it was fun xD
I store all parts in my Snail Stands xD. Ill applied one coat of Primer (Vallejo polyuretane white primer) on all parts. On white parts I used Tamiya acrylics XF-2 Flat White. On Silver parts Tamiya acrylics X-11 Chrome Silver and on Gold parts Tamiya Acrylics X-12 Gold Leaf. I made my own color scheme with unique separations.
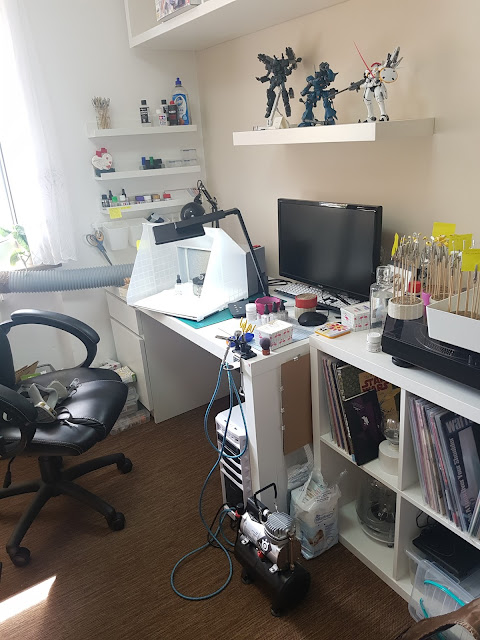
My well organized work space turn during Painting process into organized mess xD Its always good to make some notes about parts with different colors before, or you can easily paint parts with another unwanted color. Auch xD
I made masking for first time in my life and it was pretty fun. Very precize and time-consuming process. You also need a lot of patience with very small parts. Like on V-fin on the picture, ou yeah love the gold detail in the middle xD
At first I wanted to made masking only on some parts, but then I realised that I want to jump into it and make this project pretty interesting. It was also challenge for me xD
Oh I almost forgot that on many armor parts I applyed my new discovery - Schmincke Aero Color Aero Shine 28 901 gold with pearl effect. Color separation is very soft, but I kinda like it. Vhen you move parts under light you will see a different xD
And now some informations about number of coats and some additional interesting things:
WHITE COLOR - base color for all armor parts, 3 light coats, 15PSI, cca 60% color 40% thinner.
GOLD COLOR - effect color, 1 rough coat, 18PSI, cca 50% color 50% thinner
SILVER COLOR - same as Gold color
PEARL COLOR - effect color, 1rough coat, 18PSI, cca 50% color 50% water
TRANSPARENT COLOR - Pledge Top shine on some transparent parts, 1 medium coat, 15PSI, no thinning
Important is to let parts to dry enough time: cca 1 day between every coat, which fits me perfectly. I just continue on project in the same time like previous day xD After all painting I applied Pledge Floor Care as a Top Coat. 15PSI, no thinning.
The most challenging parts was mainly tiny teiny all head parts.
And after some hard days spend on painting - woala all parts are finished. In this time I thought that after hour or two everything will be finished xD That was a lie xD I forgot to mask parts which needed to be joined. A little bit of flustration happened, but trust me or not this step took me circa 5 hours to finished. I think that next time its much better to mask those parts before xD
CLOSE LOOK TO FINISHED PARTS
As first body part I finished head and I must say I was sooo impressed with myself and with this great results. This head look just sexi and savage xD I hit color separations just right and this look fits to me.
Some effect touch upps for shoulders and arms. Gold is main eye-catching color, but on the other hand silver make light color separation. Pearl effect support this angel-look xD.
Leg day baby xD I used just silver, shine and white colors on legs. I wanted keep main gold color attendtion on top of the suit. Kinda like it xD
Jeah man, golden waist look pretty nice. I archieved nice contrast between legs and upper part. Now Iam glad that I painted Inner Frame of this MS, Silver inner frame parts are visible on much places and improve overall look.
And the hardest part of body assembling was chest. Oh man, parts just conspired against me xD I painted middle part from inside and on outer shine I used Pledge top coat.
I was able to finished main body assembling and now Iam pretty happy with all results. Now I must consister color scheme for rifles and wings. I have some ideas about wooden stand etc. Hope You guys like this entry xD


NsudeOpi-ze1978 Amber Helmbrecht https://wakelet.com/wake/J8hSdSAhOakLHvWxer5-8
ReplyDeleteanfarale
crusicfoe-te Jessica Wright Movavi Video Editor
ReplyDeleteVysor
Kerish Doctor
workpulinthumb